Local Development
Project Layout
.
assets/ # contains logos and icons
src/ # contains entry point of code
├─ definitions/ # contains definition files for metadata
├─ forms/ # contains registration / settings forms
├─ methods/ # contains functional implementation
├─ index.(ts || js) # exports object containing implementation and metadata definition
├─ server.(ts || js) # local test harness to run the definition from index as a web server
Running Locally
TypeScript
Make sure to run npm run-script build to transpile your TypeScript before running any local development commands.
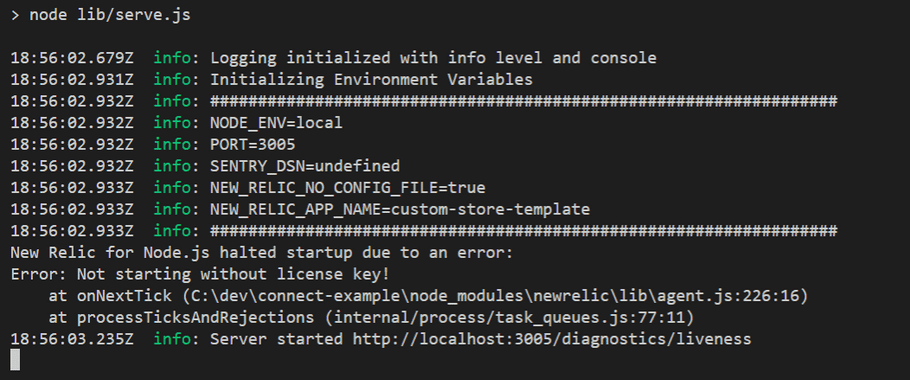
You can use the npm start command to run the test webserver locally:

This will start a web application running on http://localhost:3005/
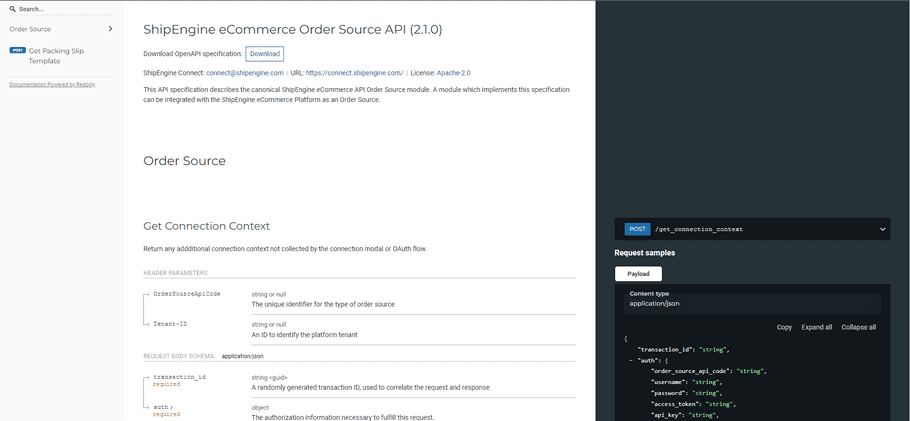
From your browser you can go to http://localhost:3005/docs to see the OpenAPI
specification for your app.

You can use an application like Postman or curl
to make HTTP requests to the server. Each of the functions you write in
src/methods is exposed as an endpoint accessible via a POST request. For example,
to invoke the function GetRates that is defined in src/methods/get-rates.ts:
curl -X POST http://localhost:3005/GetRatesUnit Tests
Another great way to test locally is to write unit tests for your code. For example, you can use the Jest testing framework for executing the methods without needing to use the HTTP server.
Steps for Installing Jest
JavaScript
-
Run
npm install jest --save-dev - Define the test command in package.json to invoke jest:
{
        "scripts": {
            "test": "jest"
        }
}- Add a root level tests/ directory
- Add a test Example: tests/sales-order-export.test.js
// /tests/sales-order-export.test.js
const { SalesOrdersExport } = require('../src/methods/sales-orders-export/index');
describe('When SalesOrderExport is called with a valid request',() => {
    it('it should export at least one sales order', async () => {
        const results = await SalesOrdersExport({
            auth: {
                username: 'name',
                password: 'password'
            },
            criteria: {
                from_date_time: '2022-04-04T00:00:00.000Z',
                to_date_time: '2022-04-18T00:00:00.000Z'
            }
        });
        expect(results.sales_orders.length).toBeGreaterThanOrEqual(1);
    })
})-
Run tests by using
npm run-script test
TypeScript
-
Run
npm install jest @types/jest ts-jest --save-dev -
Run
npx ts-jest config:init -
Define the
test
command in
package.json
to invoke jest:
{ "scripts": { "test": "jest" } } - Add a root level /tests/ directory
-
Add a test Example:
/tests/sales-order-export.test.ts
// /tests/sales-order-export.test.ts import { SalesOrdersExport } from "../src/methods/sales-orders-export"; describe("When SalesOrderExport is called with a valid request", () => { it("it should export at least one sales order", async () => { const results = await SalesOrdersExport({ transaction_id: "", auth: { order_source_api_code: "", username: "name", password: "password", }, criteria: { from_date_time: "2022-04-04T00:00:00.000Z", to_date_time: "2022-04-18T00:00:00.000Z", }, }); expect(results.sales_orders.length).toBeGreaterThanOrEqual(1); }); }); -
Run tests by using
npm run-script test
Mocking
You can mock function calls to the outside world with Jest. This can be extremely useful for testing without needing valid credentials. Documentation can be found on Jest's website here
Verifying App Packaging
The shipengine-connect pack command allows you to package your application without
publishing it. It moves your dependencies into bundledDependencies, runs
npm pack, and creates a tarball
in the root of your project that you can inspect.
warning
If a tarball already exists in the root of your project, it will be overwritten.
This provides you with visibility as to exactly what is being sent to ShipEngine
Connect. This is useful for ensuring that you are not sending us any sensitive
data. It is also helpful in making sure you aren't including any unnecessary files
in your package. For example, this may help you identify packages that are listed
in your dependencies that should actually be listed in your devDependencies.
We suggest that you use the
files property of your
package.json file to list which files to allow in the package. Likewise, you
can create a .npmignore file
to specify which files to exclude from your package.
shipengine-connect pack